Pinegrow: Adding A Header to a Master Page
This tutorial illustrates how to add a brand image and menu at the top of a Master Page, so they will appear in this position across the whole site.
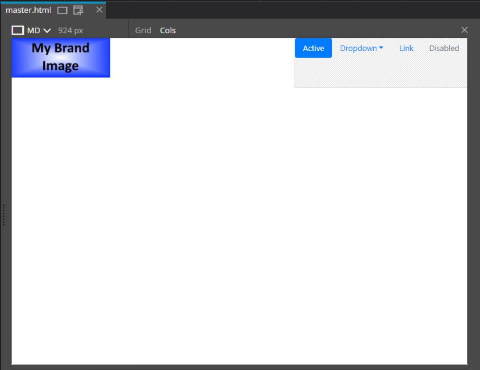
We are going for a common layout with the brand image in the top-left and the menu in the top-right of the browser window, as shown above.
Click the arrow pointing right to get started.
Click the arrow pointing right to get started.
Steps 1 to 10 will take you through getting the menu into a Div element at the top of the page.
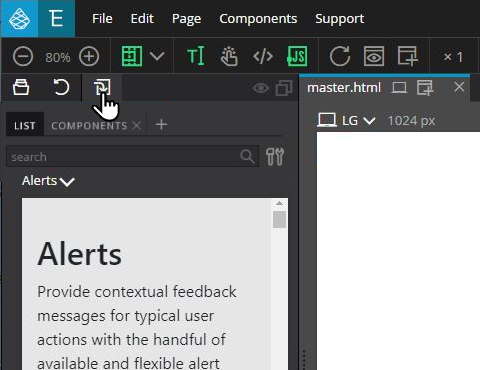
1
Click the
Library button >
Components.
*If the Components list is not displayed, then Bootstrap is not activated - see this tutorial.
*If the Components list is not displayed, then Bootstrap is not activated - see this tutorial.
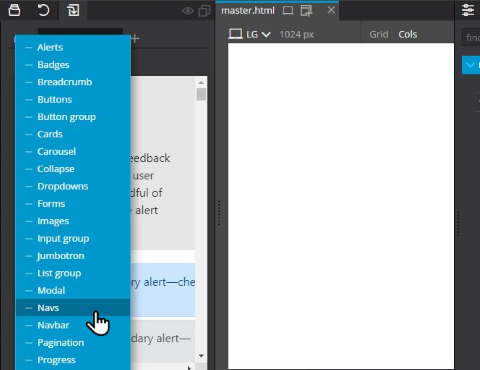
2
- Click Alerts ˅ for the drop-down menu
- Select Navs.
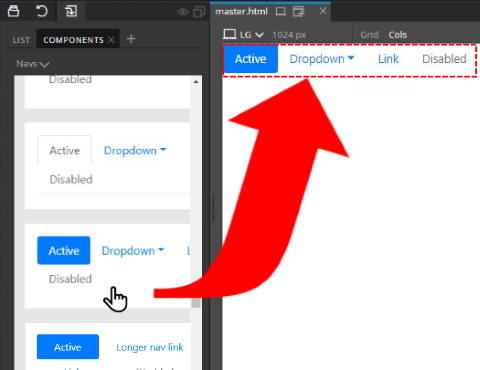
3
Scroll down to find a suitable Nav component from the options in the list and drag it to top-left of the page.
4
We want this menu to be positioned in the top-right with our brand logo top-left. For this, we'll add a Div tag and apply the
flexbox property.
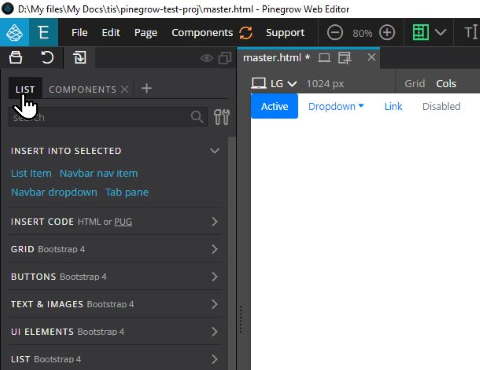
Click List to bring up the list of HTML tags you can add to the page.
Click List to bring up the list of HTML tags you can add to the page.

5
Type
div in the search field. You will see the div element under
GROUPING ELEMENTS.
6
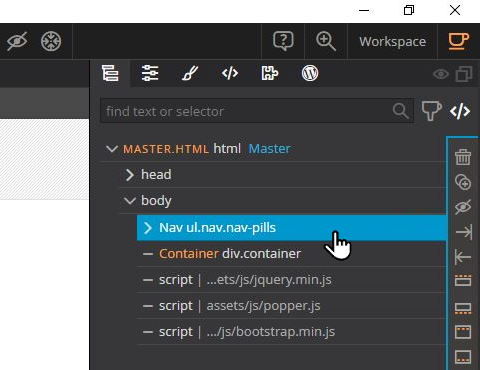
Move over to the Tree (Page structure) on the right. Click the
Nav element to select it.

7
Back on the left side of the Pinegrow window, right-click
div then click
— Insert before Nav....
8
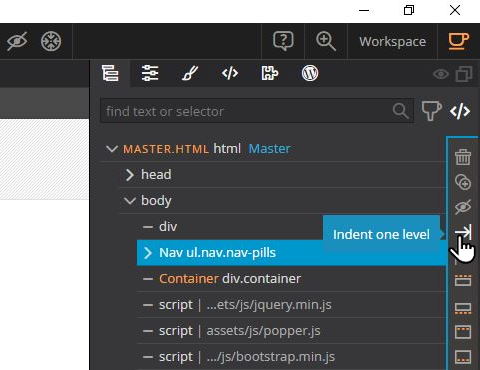
Click the right-pointing arrow,
⇥, to position the entire Nav tag inside the div (Indent one level).

9
You will see the menu is positioned within the Div element and this is reflected in the Tree on the right.
Next:
In steps 10 to 12, we will set styles for this new Div that will contain the brand image and the menu...
In steps 10 to 12, we will set styles for this new Div that will contain the brand image and the menu...
10
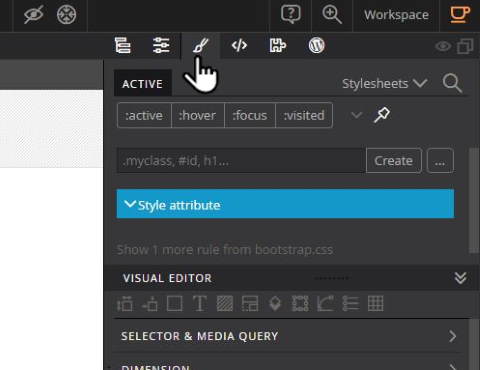
With the top Div element selected in the Tree, click the
Style (CSS) button to reveal the Visual Editor for CSS styles.
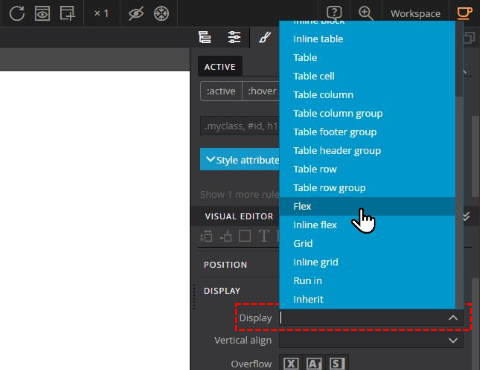
11
- Find Display in the list of Data Types
- Select Display: Flex.
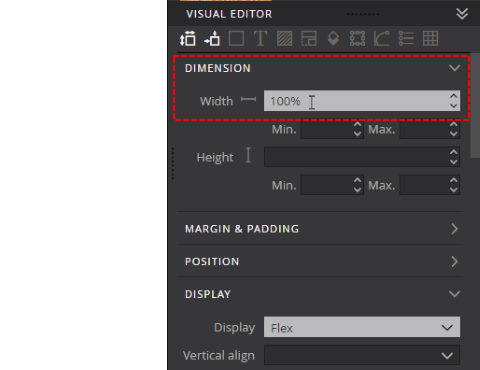
12
And for the
DIMENSION data type, in the
Width field, type
100%.
Next: Steps 13 to 15
Create a new Div element to contain the brand image.
Create a new Div element to contain the brand image.
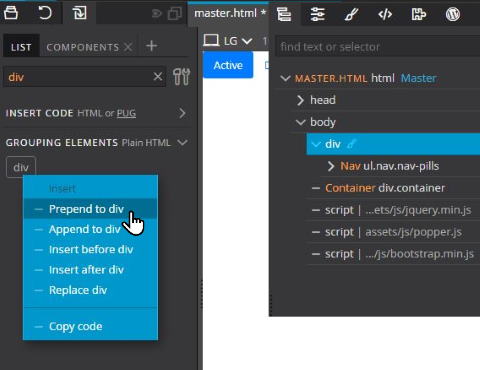
13
- Select the div in the Tree
- Right-click div under GROUPING ELEMENTS
- Click Prepend to Div (this means insert a new Div element at the beginning of the one selected in the tree).
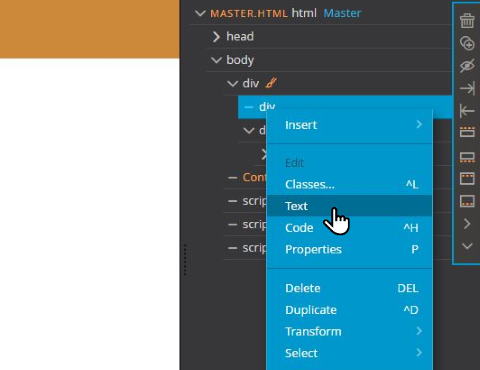
14
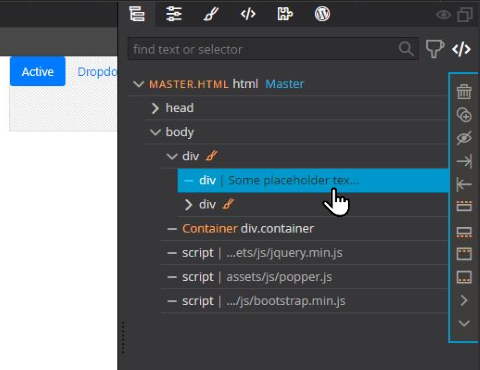
For now, add some place holder text in this Div: right-click on the
div element in the tree > Click
Text and type a few words, which will appear as shown in the next pic.
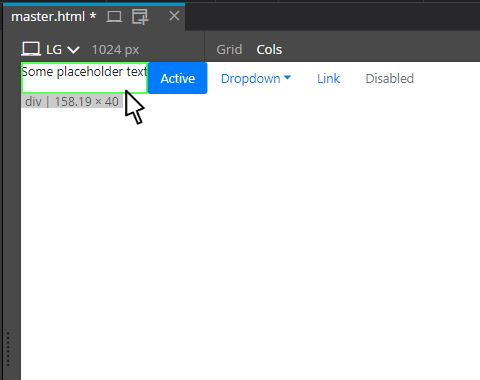
15
The place holder text you type in appears on screen.
Next: Step 16
Putting the Nav in it's own Div element.
Putting the Nav in it's own Div element.
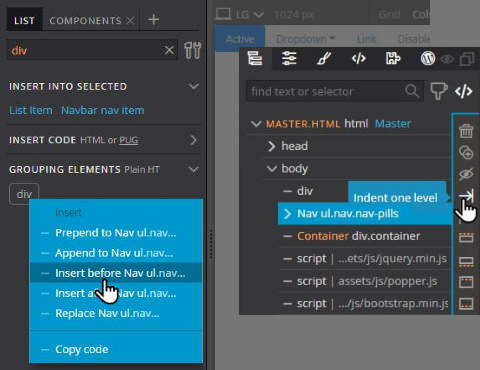
16
- Ensure the Nav is selected in the Tree
- Repeat steps 11 and 12: in the HTML elements library, right-click div and click Insert before Nav...
- Click the right-pointing arrow ⇥ to Indent one level.
Next: Steps 17-19
Positioning this new Div in the top-right corner.
Positioning this new Div in the top-right corner.
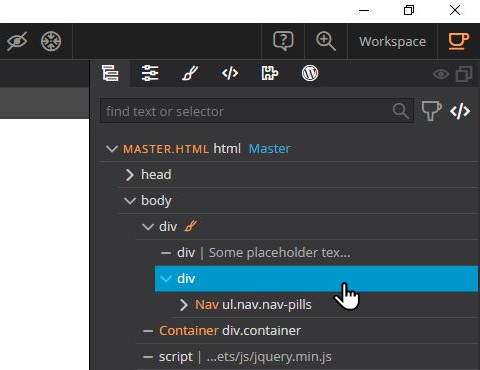
17
Select the
div element in the tree.
18
Click the
Style (CSS) button as in step 10 to reveal the Visual Editor.
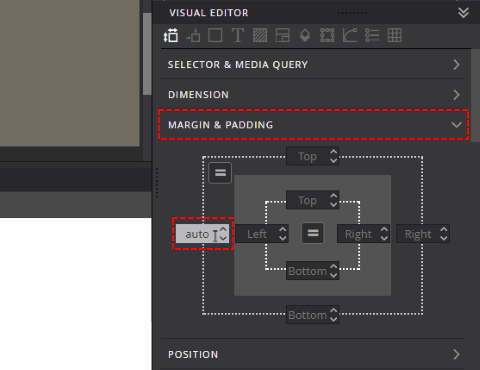
19
Click in the
Margin-left field and type
Auto.
Next: Steps 20-21
Putting the brand image in place.
Putting the brand image in place.
20
Select the
Div element in which the image is going to be placed.

21
Click the
Project button and find the image file; right-click on it and click
Append image to div. After adding the image, remove the placeholder text.
22
We now have the image and menu in our intended layout.
Next: Step 23
Put the text you want in the Menu labels.
Put the text you want in the Menu labels.
23
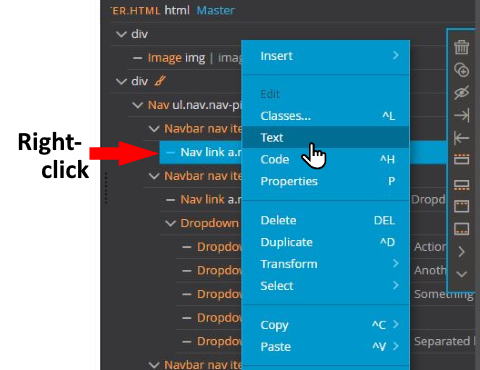
- Right-click a Nav link element > click Text
- Type in the appropriate text.
- If you know the target URL of the link, select the text and use CTRL+K on the keyboard to enter the details.
Next: Steps 24-25
Put the correct text in the drop-down menu labels.
You can amend text in an element which is visible on the page by right-clicking it either in the WYSIWYG area or in the Tree.
However the drop-down menu is not displayed. The following two steps explain the solution to this.
Put the correct text in the drop-down menu labels.
You can amend text in an element which is visible on the page by right-clicking it either in the WYSIWYG area or in the Tree.
However the drop-down menu is not displayed. The following two steps explain the solution to this.
24
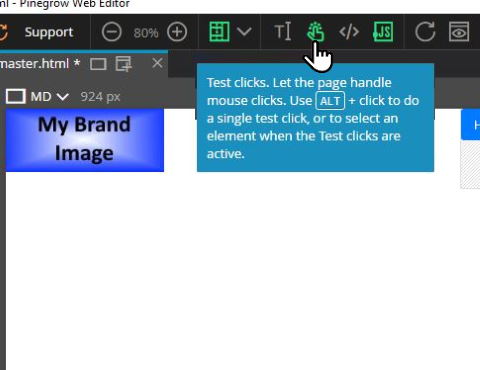
Click the
Test Clicks button. Now elements on the page will display on-click behaviour as if in a browser - so you can display the drop-down list.
25
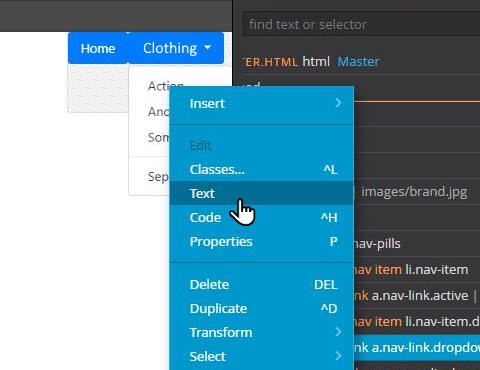
Right-click an item in the drop-down list > click
Text. Type in appropriate text for the label. Again, if you already know the target URL, select the text, press CTRL+K and enter the details.
Next: Step 26
Re-order the items in the drop-down menu.
Re-order the items in the drop-down menu.

26
In this example,
All Clothing belongs at the top, with the separator between that link and the rest of the list. We can reorder these elements using Click-and-Drag in the Tree.
Next: Steps 27 to 29
Create an Editable Area to enable the Active link feature.
The simplest method is to make the whole Nav tag an editable area...
Create an Editable Area to enable the Active link feature.
The simplest method is to make the whole Nav tag an editable area...

27
- Select the Nav in the Tree
- Click the Actions button (which looks like a Jigsaw piece).
28
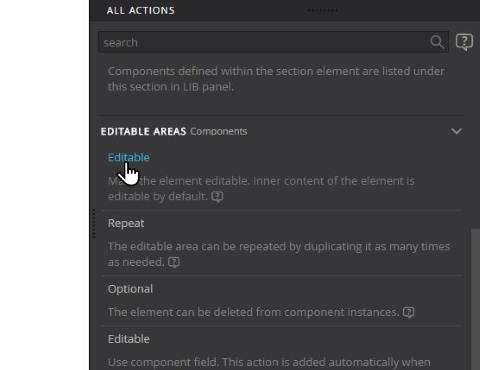
Scroll down the Actions panel to find
EDITABLE AREAS. Click
Editable.
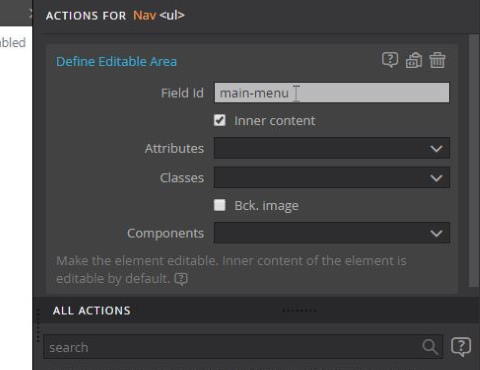
29
Type a suitable name for the
Field ID.

30
Lastly with the menu, for our purposes, we won't have any disabled links, so we can delete it from the menu: click this item in the tree, then click the
dustbin icon.
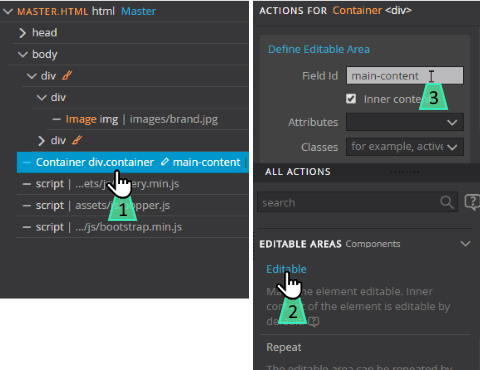
To finish off, we need to make the main content area
Editable so we can insert the specific content we want for each page based on this Master Page...
31
- Select the Container in the Tree
- Click the Actions button (jigsaw piece) and scroll down the list to click Editable.
- type a suitable name in the Field ID
The next tutorial covers the use of CSS Grid in a master page to define page layout.
If you are new to CSS Grid, follow the tutorial: CSS Grid for Basic Page Layout first.